
Protein skimmers are considered a must-have component of any reef aquarium. In nature organic substances are recycled or flushed into deeper water. Since we can’t continually flood our reef tanks with newly-made saltwater, the organics tend to build up.
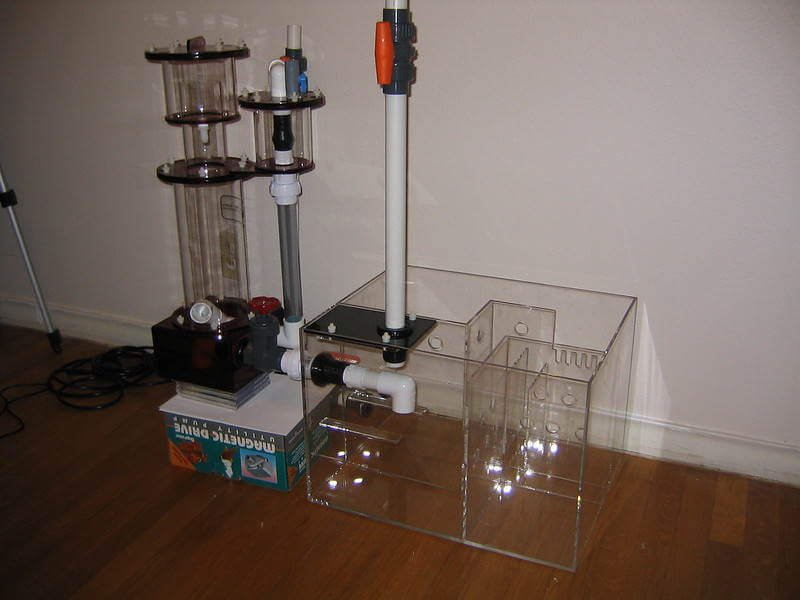
Setting up a protein skimmer with a sump (source)
Here is a list of the negative effects of organic build-up in a reef aquarium:
- Yellowish coloration of the aquarium water.
- Reduced light penetration through the water.
- Blue light is absorbed by the dissolved organics.
- Poor coral growth and coloration.
- Increase in disease-causing organisms.
- Excess algae growth caused by nutrient build-up.
In the early days of the reef hobby protein skimmers were big, complicated and didn’t have a lot of adjustability. If you had a small aquarium you were out of luck. But all that’s changed with today’s modern protein skimmers. They are smaller, more efficient and easier to use. Even better, there’s a protein skimmer for any size reef aquarium. The four basic types of protein skimmers include internal, hang-on-back, in-sump and external.
Here’s the basic difference between types of protein skimmers:
- Internal skimmers can be integrated into in-tank filter systems or mount inside the aquarium.
- Hang-on-back protein skimmers are designed to hang on the outside of the aquarium.
- In-sump skimmers sit inside a filter sump.
- External protein skimmers sit completely outside of the aquarium.
Protein skimmers come with a set-up manual to guide you through the process. You can often find on-line videos that demonstrate how to install and adjust it on your aquarium. If you’re setting up your first reef aquarium, we’ll cover the basic set-up and operation to help you get started. Even if you have no experience with protein skimmers, this guide will help make it easier no matter what type you choose. If you’re an experienced reef-keeper having trouble with a skimmer, we’ll provide expert tips on dialing in your gear.
Internal protein skimmers
All-In-One (AIO) aquarium systems combine an aquarium and filter as a single unit. All-In One systems feature a built-in filter box. The box is attached to the back of the aquarium, on the inside or outside of the tank. This filter design eliminates equipment, hoses and wires running around and under the aquarium.
AIO aquariums have greatly simplified setting up a reef aquarium. The filtration system comes with an overflow and submersible return pump to drive the system. There’s a space for a submersible heater.
Some AIO aquariums include a protein skimmer specially designed to fit inside the filter box. You’ll find some AIO aquarium manufacturers offer an internal protein skimmer designed to drop into the filter box. It will fit perfectly with no modifications required. Some AIO aquariums come with the filter system “unloaded”. You’ll have to select a protein skimmer that fits inside the unit.
If you’re shopping for a skimmer, compare its dimensions with the available space in the filter box. Also take a look at the space above the tank. You may not want a super-tall protein skimmer rising from the rear of your aquarium!
AIO skimmers may be driven by an air stone but most use a small DC water pump to push water through the skimmer and whip up foam.
Tips for AIO protein skimmers:
- Check the dimensions of your AIO filter system. Measure the protein skimmer compartment to make sure the skimmer fill fit. Also note where the water in and out positions are to be sure everything lines up properly.
- Be careful to route the adjustment airline so it does not kink.
- All-In-One skimmers tend to be smaller in size, including the collection cup. The skimmer cup will need to be monitored every few days to avoid an overflow. Your skimmer may have the option to attach a drain hose to send skimmate to a larger container.
- Any air hose or power cord is a potential source of water drips and salt creep. Use a drip loop on all electrical cords. Wipe away salt creep every week to prevent build-up.
- Closely watch the new skimmer during the first week or so. You will have to make adjustments to fine-tune the air injection as the skimmer starts to make foam. You may need to adjust the collection cup height too. The product manual will provide specific instructions on how to do this.
In-tank nano skimmers use a thin glass or plastic tube that serves as a contact chamber. It’s mounted inside the aquarium with a hanger or suction cup.
In-tank protein skimmers use a limewood air stone to pull water into the chamber and create foam. There is no collection cup. Foam and liquid flows from a piece of airline tubing at the top of the skimmer. Skimmate is collected in a container under the aquarium. The air-driven system eliminates a separate electric water pump and other molded plastic fittings.
Tips for installing a skimmer inside a nano reef:
- The skimmer can be installed anywhere inside the tank, but most aquarists prefer to place it toward the back of the aquarium. This location helps to hide the input airline, skimmate overflow tubing and the collection cup. Most nano aquarists agree a reef aquarium looks better when the hardware is out of sight or at least not front and center.
- Be careful not to stack live rock against the contact chamber. Every month or so you’ll need to pull the skimmer out of the tank for cleaning and maintenance. Its not a good idea to stabilize rockwork against any piece of hardware.
- Air-powered protein skimmers will eventually suffer from salt crust build-up inside the airline and around the fittings. This will restrict airflow to the limewood air stone. It can also clog the drain line, causing skimmate not to flow out of the skimmer. The easiest way to clean the lines and skimmer is to completely flush the air adjustment valve, fittings and tubing with freshwater. Since a nano skimmer is so small, it’s easy to take it to the kitchen sink for cleaning.
- The small air pumps used to drive the air stone works by a magnetic action. The motor vibrates a rubber diaphragm in the pump. The vibration can make a humming noise, especially inside an aquarium cabinet. You can place the air pump on a thick bath towel. The fabric isolates the vibration and quiets the air pump.
Hang-On-Back protein skimmers
Hang-On-Back (HOB) skimmers are great for non-AIO reef aquariums or tanks without a filter sump. HOB skimmers attach to the aquarium just like an external power filter.
These skimmers are designed to be hung on the back of the reef tank. There’s no special plumbing and you won’t have to make any modifications to your aquarium.
HOB protein skimmers work like a power filter. Just position the unit on the back of the aquarium. Fill the skimmer with water and plug it in. HOB protein skimmers have a water pump inside. The pump creates micro bubbles for skimming and forces water out of the skimmer and back into the aquarium. The siphon action of the intake tube will continuously refill the skimmer as clean water returns to the aquarium. The skimmer cup is removable for easy cleaning.
Some HOB designs allow you to add a drain line to capture skimmate in a larger container. You’ll find HOB skimmers for small, medium and even large aquariums up to 175 gallons!
Tips for setting up hang-on-back protein skimmers:
- HOB skimmers take up space behind the aquarium. Be sure to measure the space between the aquarium rim and the wall behind the tank. If it’s too tight, it will be difficult to service the skimmer.
- Wash the skimmer with warm water before installing it on the aquarium. This will remove residual manufacturing oils that inhibit foam formation.
- Adjust the level or “tilt” of the protein skimmer as directed in the manual. The skimmer body should be parallel to the aquarium.
- Always keep the water level in the aquarium within an inch or two from the rim of the tank. HOB skimmers work like power filters. It will lose its siphon and run dry if the water level drops too low. Low water level also promotes water splash and salt build-up outside of the aquarium.
- Wash out the skimmer collection cup every week.
- Clean the internal water pump every three months to maintain performance.
In-sump protein skimmers
Heavily stocked and full-size reef tanks need larger protein skimmers. If you’ve got a lot of SPS or LPS corals in a larger aquarium, you need a heavy-duty protein skimmer.
The easiest way of running a big skimmer is inside a filter sump. The filter sump acts as a reservoir under the aquarium. It’s the central location for filtering the aquarium water and for protein skimming.
Installation is easy. There’s no need for external plumbing, cutting of holes and bulkhead fittings. Just drop the skimmer into the sump and plug it in! Internal protein skimmers normally come with a matched DC water pump. The water pump takes aquarium water from the sump and sends it through the skimmer. The pump also creates the micro bubbles necessary to make foam. The purified water is released back into the sump.
Depending on the skimmer model you’ll adjust the performance with valves or even a pump speed controller. There are a wide variety of in-sump skimmer designs and sizes. Some filter sumps come with a special skimmer compartment.
How to set up internal protein skimmers:
- Before purchasing a skimmer, measure the available space inside the filter sump and inside the aquarium cabinet. You’ll need room to install and maintain the skimmer.
- Always read the manual before trying to assemble the skimmer. Make sure all the parts are there and you’re familiar with the components.
- Wash the skimmer in warm water to remove manufacturing residue.
- Tall, narrow internal skimmers need to be “clamped” to the side of the sump. Some internal skimmers come with a mounting feature. This keeps the skimmer level and prevents tip-overs. It also makes it easier to remove the skimmer cup with one hand.
- Some in-sump models position the submersible pump outside the skimmer. Check the dimensions to make sure it fits in your sump.
- Advanced protein skimmers have a wired DC pump controller. Mount the controller away from water spray and salt creep.
- Skimmer performance can change as the water level in the sump drops. Keep the sump topped off to maintain optimal performance. The manufacturer will provide specific water level recommendations for your model.
Final recommendations
No matter what size reef aquarium you have, you’ll enjoy these benefits from protein skimming.
- Vivid coral coloration from improved photosynthesis
- Improved coral growth
- Clear water with no yellow discoloration
- Better light penetration throughout the aquarium
- Faster recovery from fragging
- Healthy fish
- Less algae growth on the glass
- Reduced red slime (cyanobacteria)
- Less nitrate and phosphate in the water
Read the manual and become familiar with how your skimmer functions. If there is one “secret” to protein skimmer set-up it’s patience!
The key to success is allowing the skimmer time to break in and start removing organics from the water. Make adjustments slowly over the first couple of weeks. Constantly changing settings won’t speed up the break-in process. Eventually the protein skimmer will settle into a highly efficient operation requiring minimal input. In no time you’ll be enjoying all the benefits protein skimming brings to a reef aquarium!
NavigationInternal protein skimmersTips for AIO protein skimmers:Tips for installing a skimmer inside a nano reef:Hang-On-Back protein skimmersTips for setting up hang-on-back protein skimmers:In-sump protein skimmersHow to set up internal protein skimmers:Final recommendations